Lifestyle
How to Make Slime: The Ultimate DIY Guide for Kids and Adults

Slime is more than just a fun toy—it’s a sensory experience, a stress reliever, and even a basic science project rolled into one. Whether you’re a parent looking for an engaging activity for your children, a teacher creating a hands-on learning lesson, or an adult needing a therapeutic creative outlet, learning how to make slime is both rewarding and surprisingly easy.
In this comprehensive guide, you’ll discover different slime recipes, tips for achieving perfect texture, ways to customize your slime, and troubleshooting advice to ensure success every time. So grab your ingredients and let’s get into the sticky, stretchy fun!
Why Slime is So Popular
Slime has become a viral trend across YouTube, TikTok, and Instagram, and for good reason. It’s colorful, tactile, and endlessly customizable. From glittery to glow-in-the-dark, from fluffy to crunchy, there’s a version of slime for every personality and mood.
Slime-making also bridges the worlds of fun and education. It teaches children about chemical reactions, polymers, and measurements in a playful way. For adults, making slime can provide a satisfying outlet for creativity and stress relief—almost like mindfulness in a bowl.
Essential Ingredients You’ll Need
Before we jump into different recipes, let’s go over the most commonly used ingredients in slime-making:
Core Ingredients
-
White school glue: This is the foundation of most slimes. Elmer’s glue is a popular choice.
-
Borax or saline solution: These act as the activator that gives the slime its elasticity.
-
Baking soda: Helps stabilize the texture when using contact lens solution.
-
Water: Used to adjust consistency.
Optional Add-ins
-
Food coloring: For bright, eye-catching colors.
-
Glitter: Adds sparkle and fun.
-
Foam beads or clay: For texture variety.
-
Scents or essential oils: To make the slime smell pleasant.
Basic Slime Recipe: The Classic Formula
This is the simplest and most widely used slime recipe, perfect for beginners.
Ingredients
-
1/2 cup white school glue
-
1/2 cup water
-
1/2 teaspoon baking soda
-
1 tablespoon contact lens solution (must contain boric acid)
-
Food coloring (optional)
Instructions
-
Mix the glue and water in a bowl until fully combined.
-
Add food coloring if desired.
-
Stir in baking soda until dissolved.
-
Slowly add the contact lens solution while stirring continuously.
-
The slime will begin to form. Knead it with your hands until it reaches your desired consistency.
-
Store in an airtight container to keep it fresh.
Fluffy Slime Recipe: Soft and Squishy
For a softer, marshmallow-like texture, fluffy slime is a fan favorite.
Ingredients
-
1/2 cup white school glue
-
3 cups shaving cream
-
1/2 teaspoon baking soda
-
1 tablespoon contact lens solution
-
Food coloring (optional)
Instructions
-
In a bowl, mix glue and shaving cream together.
-
Add food coloring for a pop of color.
-
Mix in baking soda.
-
Slowly add contact lens solution and stir.
-
Once it forms, knead the mixture until it’s fluffy and stretchable.
This kind of slime is great for sensory play and younger children because it’s less sticky.
How to Make Slime Without Borax
For those who want a safer, non-toxic option (especially for younger kids), here’s a borax-free alternative.
Ingredients
-
1/2 cup white glue
-
1/2 cup water
-
1/4 cup liquid starch (available in the laundry aisle)
-
Food coloring (optional)
Instructions
-
Combine glue and water in a bowl.
-
Add food coloring if desired.
-
Slowly stir in liquid starch while mixing.
-
As slime starts forming, knead it until smooth.
This method is safe and straightforward, making it a great choice for classrooms and younger audiences.
Crunchy Slime Recipe: Texture You Can Hear
If you love tactile and auditory stimulation, crunchy slime is for you.
Ingredients
-
1/2 cup glue
-
1/2 cup water
-
1/2 teaspoon baking soda
-
1 tablespoon contact lens solution
-
1/4 cup foam beads or plastic beads
-
Food coloring (optional)
Instructions
-
Mix glue and water in a bowl.
-
Add food coloring if using.
-
Stir in baking soda.
-
Add contact lens solution and mix until slime forms.
-
Fold in the foam beads to create that crunchy sensation.
The beads create a delightful crackle when the slime is squeezed, which is oddly satisfying.
Magnetic Slime: A Science Experiment
For a more advanced project, magnetic slime adds a scientific twist.
Ingredients
-
1/2 cup white glue
-
1/2 cup water
-
1 tablespoon iron oxide powder
-
1/2 teaspoon baking soda
-
1 tablespoon contact lens solution
-
Neodymium magnet
Instructions
-
Combine glue and water in a bowl.
-
Mix in iron oxide powder (wear gloves and mask if needed).
-
Stir in baking soda.
-
Add contact lens solution to form slime.
-
Use a magnet to move the slime around—it will follow the magnetic field!
This recipe doubles as a physics lesson and is ideal for science fairs or homeschool projects.
Troubleshooting Common Slime Problems
Even the most seasoned slime makers run into issues. Here’s how to fix common problems:
Slime is too sticky
-
Add a few drops of contact lens solution and knead again.
-
You can also add a bit more baking soda to firm it up.
Slime is too hard
-
Try adding a bit of warm water and kneading thoroughly.
-
Add more glue to soften.
Slime won’t form
-
Double-check that your contact lens solution contains boric acid or sodium borate, which are essential activators.
Storing and Caring for Your Slime
Slime lasts longer when stored properly. Keep your creation in an airtight container or ziplock bag when not in use. If it starts to dry out, add a tiny bit of water and knead it. Never store slime on fabric or carpet—it can leave a stain.
Also, wash your hands before and after playing to avoid transferring oils or bacteria to your slime.
Fun Slime Variations to Try
Once you master the basics, you can experiment with unique twists:
-
Glow-in-the-dark slime: Add glow pigment powder or glow-in-the-dark paint.
-
Scented slime: Use kid-safe essential oils like lavender or peppermint.
-
Galaxy slime: Mix dark blues, purples, and glitter for a cosmic look.
-
Butter slime: Mix in soft clay to make a buttery, moldable texture.
-
Slime kits: Pre-packaged kits offer convenience and reduce mess.
The options are virtually endless once you know how to make slime in its basic form.
Is Slime Safe?
Generally, yes—especially if you use non-toxic glue and follow proper recipes. However, it’s important to supervise young children and make sure they don’t put slime in their mouths. Avoid borax if you have sensitive skin or allergies and always wash hands afterward.
If you’re worried about chemical exposure, choose borax-free recipes or use natural glue options.
Educational Benefits of Slime Making
Making slime is more than just a craft—it’s a STEAM (Science, Technology, Engineering, Arts, and Mathematics) activity. Children can learn:
-
Science: Understanding polymers and viscosity.
-
Math: Measuring and ratios.
-
Creativity: Customizing colors and textures.
-
Responsibility: Caring for their slime and workspace.
It’s an excellent rainy-day activity that’s also educational.
Hosting a Slime Party
Want to take it up a notch? Host a slime-making party! Provide various colors, glitters, and mix-ins so guests can create their own custom slimes. Use disposable tablecloths and provide containers for guests to take their creations home.
Slime parties are popular for birthdays, classroom fun days, or family get-togethers—and they’re easy to organize with a little preparation.
Conclusion: A Sticky Hobby Worth the Hype
Now that you know how to make slime, you’ve unlocked a world of sensory fun, creativity, and hands-on science. Whether you’re making it with your kids, hosting a party, or simply relieving stress with a satisfying squish, slime-making is a DIY craft that brings joy to all ages.
The beauty of slime is that there’s no limit to how you can personalize it. As long as you have glue, a bit of activator, and an open mind, you’re ready to create magic in your hands. So go ahead—gather your ingredients, roll up your sleeves, and enjoy the squishy, stretchy journey of slime creation.

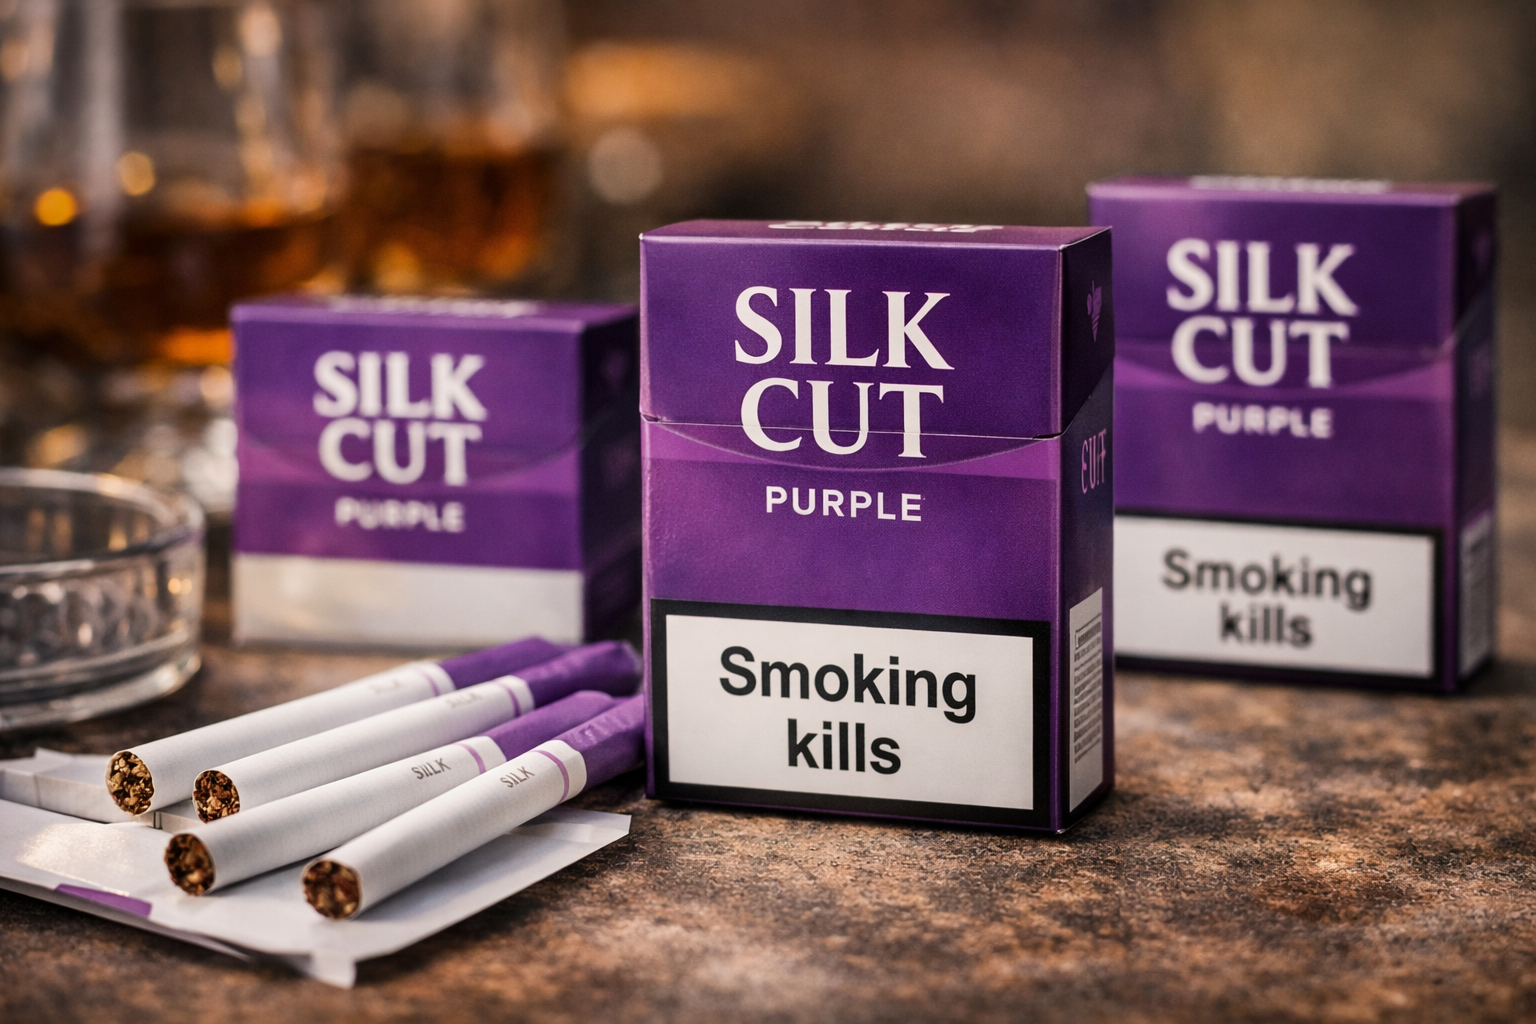
Silk Cut Purple Strength: Everything You Need to Know
In the world of cigarettes, Silk Cut Purple Strength has long stood out as a premium choice for smokers seeking a balanced yet impactful experience. Renowned for its smooth flavor and distinctive strength, it has earned a dedicated following across the UK and beyond. But what exactly makes this cigarette variant special, and how does it differ from other Silk Cut offerings?
In this comprehensive guide, we’ll explore everything from the history and flavor profile to user insights, health considerations, and tips for understanding cigarette strength. Whether you’re a long-time smoker or curious about this iconic brand, this article will give you an expert breakdown of Silk Cut Purple Strength.
The History of Silk Cut
Silk Cut has a rich history dating back to the mid-1960s, and it quickly became synonymous with innovation in the cigarette industry. The brand was one of the first to introduce low-tar options without compromising flavor, appealing to smokers seeking a lighter yet satisfying experience.
Over the decades, Silk Cut has expanded its product line, introducing several variations distinguished by color-coded packaging and differing strength levels. Among these, Silk Cut Purple Strength has carved a reputation for offering a refined yet potent smoking experience.
What Is Silk Cut Purple Strength?
Silk Cut Purple Strength is recognized for its moderate-to-strong impact, striking a balance between flavor and nicotine content. Unlike ultra-light or ultra-strong variants, this cigarette is designed for smokers who want a noticeable taste without an overpowering intensity.
Key characteristics include:
-
Flavor: Smooth with subtle hints of tobacco richness
-
Nicotine Strength: Moderate, offering a satisfying but not harsh experience
-
Tar Content: Balanced for a smooth draw
-
Design: Slim and sleek, maintaining Silk Cut’s signature aesthetic
Smokers often describe it as a premium choice that bridges the gap between lighter cigarettes and high-strength options, making it versatile for both casual and regular users.
Comparing Silk Cut Purple Strength to Other Variants
Silk Cut offers multiple varieties, each with unique strength and flavor profiles. Here’s how Purple Strength compares:
| Variant | Strength | Flavor Notes | Target Audience |
|---|---|---|---|
| Silver | Low | Smooth, mild | Light smokers |
| Blue | Medium | Balanced, mellow | Regular smokers |
| Purple | Moderate-High | Rich, smooth | Smokers seeking impact without harshness |
| Black | High | Strong, full-bodied | Experienced smokers |
By understanding these distinctions, smokers can choose the variant that best suits their preferences, ensuring satisfaction without overconsumption.
Why Silk Cut Purple Strength Is Popular
Several factors contribute to the enduring popularity of Silk Cut Purple Strength:
1. Balanced Experience
It offers a satisfying nicotine hit without being overly harsh, making it appealing to a wide range of smokers.
2. Premium Branding
Silk Cut’s sleek design, recognizable purple packaging, and consistent quality elevate it above standard options.
3. Smooth Flavor
The cigarette maintains a smooth draw, appealing to those who prioritize taste alongside strength.
4. Consistency
Smokers can expect a uniform experience with every cigarette, reinforcing brand loyalty.
Tips for Enjoying Silk Cut Purple Strength
Even for seasoned smokers, there are ways to enhance the experience:
-
Store Properly: Keep cigarettes in a cool, dry place to preserve flavor.
-
Pair Thoughtfully: Many enjoy this variant with tea or coffee, complementing its smooth taste.
-
Mind Strength: Moderate consumption ensures a satisfying experience without overexposure to nicotine.
-
Experiment with Lighting Techniques: Proper lighting can enhance flavor and burn evenly.
Health Considerations
While Silk Cut Purple Strength is designed for a smooth smoking experience, it’s important to remember that all cigarettes carry health risks. Nicotine, tar, and other chemical compounds can contribute to long-term health issues, including:
-
Respiratory problems
-
Cardiovascular disease
-
Increased cancer risk
Moderation, awareness, and knowledge of cigarette content are essential for smokers who wish to balance enjoyment with health considerations.
Understanding Cigarette Strength
The “strength” of a cigarette like Silk Cut Purple Strength is a combination of nicotine, tar, and the overall smoking experience. Strength categories often include:
-
Light: Mild, less nicotine, smoother flavor
-
Medium: Balanced, noticeable nicotine without harshness
-
Strong: High nicotine, bold flavor, intense draw
Purple Strength is positioned in the moderate-to-strong range, making it suitable for smokers who want more than a light cigarette but less than the harshness of the strongest variants.
Common Questions About Silk Cut Purple Strength
What makes it different from Silk Cut Blue?
Purple offers a slightly higher nicotine content and a richer flavor profile, catering to smokers who desire a stronger but still smooth experience.
Can beginners smoke Purple Strength?
While it’s designed for moderate smokers, beginners should pace themselves and consider the strength before committing to regular use.
Is the flavor consistent across packs?
Yes, Silk Cut maintains quality control to ensure consistency in both strength and taste.
Tips for Choosing the Right Silk Cut Variant
If you’re exploring Silk Cut for the first time, consider these steps:
-
Assess your preference for strength (light, medium, strong)
-
Try a small pack to experience the flavor and draw
-
Compare with other Silk Cut variants to find the perfect fit
-
Pay attention to nicotine tolerance and consumption habits
LSI Keywords for Better Understanding and SEO
Using semantically related terms helps create a richer, SEO-friendly article. For Silk Cut Purple Strength, these include:
-
Silk Cut cigarettes
-
Purple cigarette variant
-
Nicotine strength
-
Cigarette flavor profile
-
Smooth smoking experience
-
Premium cigarette brand
-
UK cigarette brands
-
Tar content in cigarettes
-
Smoking tips
-
Cigarette comparison guide
Incorporating these naturally ensures higher search visibility without keyword stuffing.
Conclusion
Silk Cut Purple Strength has earned its reputation as a premium cigarette variant offering balance, flavor, and satisfaction. With its moderate-to-strong nicotine impact, smooth taste, and elegant branding, it continues to appeal to smokers who want a refined experience without harshness.
Understanding its characteristics, comparing it to other Silk Cut variants, and being aware of health considerations empowers smokers to make informed choices. Whether you’re a long-time user or considering trying Purple Strength for the first time, knowledge is key to enjoying the cigarette responsibly.
If you found this guide helpful, share your thoughts, experiences, or questions in the comments below. Learning from the community can help both new and experienced smokers make the most of Silk Cut Purple Strength.

Is Bradley Walsh Ill? Latest Health Updates Revealed
Bradley Walsh, the beloved British television presenter and actor, has been the subject of much speculation lately. Fans across the UK and beyond have been asking the same question: is Bradley Walsh ill? His cheerful demeanor on shows like The Chase and his comedic roles in dramas have always made him seem full of energy, but recent appearances and rumors have sparked concern. In this article, we dive deep into the facts, the speculations, and everything known about his health, offering readers an insightful, human perspective.
Who Is Bradley Walsh?
Before diving into health updates, it’s important to understand why Bradley Walsh is such a cherished figure in British entertainment.
| Full Name | Date of Birth | Age | Profession | Nationality | Net Worth (approx.) | Notable Works / Achievements |
|---|---|---|---|---|---|---|
| Bradley John Walsh | 4 June 1960 | 63 | Actor, TV Presenter, Comedian | British | $10 million | The Chase, Law & Order: UK, Doctor Who, Wheel of Fortune |
Bradley Walsh started his career as a professional footballer but later transitioned into entertainment. His charismatic personality and wit have made him a staple of British television. Over the years, he has built a reputation for being approachable, funny, and genuinely kind-hearted, which explains why any health speculation instantly grabs public attention.
Recent Appearances and Public Concerns
Over the last few months, some fans noticed subtle changes in Bradley’s appearance and energy levels during live television broadcasts. Whether it was a slightly slower pace, a more reserved smile, or the occasional pause during interviews, speculation about is Bradley Walsh ill began circulating on social media platforms.
It’s worth noting that television presenters often work under intense schedules. Long hours, travel, and the constant pressure of live shows can naturally take a toll. While these factors may contribute to temporary fatigue, they do not automatically imply serious illness.
Observations From Fans and Media
-
Slower movement during studio segments
-
Occasional cough or throat clearing during shows
-
Limited public appearances compared to previous years
These small observations have been enough to spark concern, which shows the level of care and attention Bradley’s fans have for him. However, experts and sources close to him have urged the public to avoid jumping to conclusions.
Statements From Bradley Walsh
To date, Bradley Walsh has not confirmed any serious illness. In fact, in interviews and appearances, he has consistently maintained his positive attitude and commitment to work. He emphasized that like many individuals in their early 60s, he occasionally experiences minor health issues, which are typical and manageable.
Bradley’s own words during a recent interview highlight this:
“I feel fit and healthy, and I’m enjoying every day. I think people just notice the small things when you’ve been in the public eye for so long.”
This statement provides reassurance that is Bradley Walsh ill may not reflect serious medical conditions but rather normal aging combined with a demanding career.
Common Health Considerations for TV Presenters
Being a television personality can be surprisingly stressful. The lifestyle involves long hours, irregular schedules, and constant travel. Common health issues that can arise include:
-
Fatigue and burnout
-
Minor viral infections or colds
-
Stress-related health conditions
-
Age-related considerations like joint stiffness or vision changes
While fans may interpret these as signs of severe illness, medical professionals often clarify that such changes are typical and not necessarily concerning.
Lifestyle Factors Supporting Bradley’s Health
Bradley Walsh is known to maintain a fairly active lifestyle despite a busy career. Factors that likely contribute to his health include:
-
Regular exercise and outdoor activities
-
Balanced diet and hydration
-
Adequate rest when not filming
-
Strong support from family and friends
These positive lifestyle choices can mitigate age-related health concerns and help maintain energy levels, which is crucial for someone in his profession.
The Role of Family and Support
Family plays a crucial role in Bradley’s well-being. His wife, Donna Walsh, and their children provide a support system that allows him to focus on work without compromising health. Many fans may not realize how important personal support networks are for celebrities, particularly when facing demanding public schedules.
Social Media and Rumor Control
Social media can amplify concerns about is Bradley Walsh ill. Minor comments, a photo showing him looking tired, or a missed public appearance can fuel speculation. It’s important to consider:
-
Not every observation on social media is accurate
-
Rumors often spread faster than facts
-
Trusted sources and official statements should guide public perception
Bradley Walsh’s management and representatives have historically prioritized transparency, ensuring any serious health concerns are communicated responsibly.
Why Fans Are Concerned
Bradley has been in the public eye for decades, and his fans feel a personal connection to him. This emotional attachment makes small changes noticeable, which is why the question is Bradley Walsh ill keeps trending.
-
Fans care deeply about his well-being
-
Long-term TV exposure creates a sense of familiarity
-
Media coverage amplifies minor health observations
While concern is natural, maintaining perspective is essential. Most indications suggest Bradley continues to work actively and remains in good health.
Experts’ Perspective
Health experts note that for someone like Bradley Walsh, occasional fatigue or minor illness is normal. Experts encourage fans to focus on verified reports rather than speculation. This aligns with broader advice on public figures: appearance or energy fluctuations do not automatically indicate serious illness.
Summary of Key Facts
-
Bradley Walsh is currently active in television work
-
No official statement confirms a serious illness
-
Observed changes are consistent with normal aging and professional stress
-
Lifestyle and support system contribute positively to his health
Table: Quick Health Snapshot
| Aspect | Information |
|---|---|
| Current Work | Hosting The Chase, acting roles, live appearances |
| Health Status | No serious illness reported |
| Public Observations | Minor fatigue, rare missed appearances |
| Lifestyle | Active, balanced diet, supportive family |
| Expert Opinion | Likely normal aging, no medical emergency |
Conclusion: Is Bradley Walsh Ill?
After reviewing all available information, it appears that is Bradley Walsh ill is more a reflection of public curiosity than confirmed health concerns. Bradley continues to work, maintain an active lifestyle, and share joyful moments with fans.
While it’s natural to worry about beloved public figures, the evidence suggests that fans can continue to enjoy his shows and performances without undue concern. His positive energy and commitment to work remain inspiring.
In addition, it’s a reminder for fans to celebrate the achievements of long-standing entertainers and appreciate the human aspect behind the celebrity image. Bradley Walsh’s continued presence in television is a testament to his resilience, charisma, and professionalism.

Why Adults Are Revisiting Childhood Favorites
The smell of fries, the taste of a perfectly crispy chicken nugget, and that little toy waiting inside a box—these are the memories that shaped many of our childhoods. But what if these experiences weren’t just for kids anymore? Enter the Adult Happy Meal, a fun, nostalgic twist that’s capturing the hearts of grown-ups everywhere. More than just a novelty, it’s a chance to reconnect with a simpler time while enjoying food that meets adult tastes.
Whether you grew up sneaking into fast food restaurants after school or reminiscing about weekend treats, the Adult Happy Meal offers a new way to enjoy those memories. In this article, we’ll explore what makes this trend so appealing, its menu options, collectibles, and why it’s more than just a gimmick.
H2: What Is an Adult Happy Meal?
An Adult Happy Meal is a modern twist on the classic kids’ meal. It typically includes:
-
A main entrée tailored to adult tastes (gourmet burgers, wraps, or upscale chicken sandwiches)
-
A side that goes beyond the traditional fries (salads, sweet potato fries, or fruit cups)
-
A drink that adults might actually enjoy (specialty sodas, iced tea, or coffee-based beverages)
-
A collectible toy or item that appeals to adult interests, from pop culture figures to nostalgic items
Unlike the classic Happy Meal aimed at children, this version is designed to appeal to both taste and nostalgia, creating a unique experience for adult diners.
H3: Why Adults Are Loving the Trend
Several factors contribute to the popularity of the Adult Happy Meal:
-
Nostalgia Factor – Adults love revisiting their childhood memories in a fun, lighthearted way.
-
Curiosity and Novelty – Unique toys or limited-edition items drive excitement.
-
Social Media Appeal – Sharing photos of quirky meals or collectible toys online adds a sense of community.
-
Upgraded Menu Options – Adults expect more sophisticated flavors, and restaurants are delivering with gourmet twists.
This combination of food, fun, and nostalgia makes the Adult Happy Meal more than a meal—it’s an experience.
H2: Menu Options and Variations
Different restaurants are experimenting with adult-focused meals, offering a variety of Adult Happy Meal options. Some of the most popular include:
-
Gourmet Burgers – Premium beef or plant-based patties with artisanal buns
-
Upscale Chicken Sandwiches – Grilled or spicy options with gourmet sauces
-
Sides with a Twist – From truffle fries to seasonal vegetables
-
Adult Beverages – Sparkling water, craft sodas, or even small-format alcoholic drinks in select locations
-
Collectibles – Fun items for adults, including pop culture figurines, puzzles, and nostalgic toys from childhood brands
H3: Collectibles and Adult-Friendly Surprises
The collectible aspect of the Adult Happy Meal is a major selling point. Companies are now designing items specifically for adult collectors, like:
-
Miniature replicas of classic toys
-
Exclusive action figures from popular movies or TV shows
-
Branded merchandise like keychains, pins, or pop culture memorabilia
These collectibles not only spark nostalgia but also give adults a reason to engage with brands in a playful, interactive way.
H2: Pricing and Accessibility
Adult Happy Meals are priced higher than traditional kids’ meals but remain affordable as a treat. Prices typically range from $7 to $15, depending on location and menu offerings. Many fast-food chains are testing these meals in select regions, and positive feedback is encouraging wider rollout.
Accessibility has also improved with online ordering apps, allowing adults to grab a meal and collectible without waiting in line, making it convenient for busy lifestyles.
H3: Health Considerations for Adult Happy Meals
Unlike traditional kids’ meals, some Adult Happy Meal options focus on nutrition, offering:
-
Smaller portion sizes with balanced nutrition
-
Alternatives to fried sides, like baked vegetables or salads
-
Drinks without added sugar or artificial flavors
While indulgence is part of the appeal, many restaurants are ensuring adult diners can enjoy the meal without compromising their health goals.
H2: Social and Cultural Impact
The rise of the Adult Happy Meal also reflects broader cultural trends:
-
Nostalgia Marketing – Brands are leveraging childhood memories to connect with adult consumers
-
Experience Economy – Adults are increasingly seeking experiences over simple products
-
Social Media Influence – Photos of quirky meals or collectibles often go viral, driving more interest
This trend has become more than a dining choice; it’s a cultural phenomenon that taps into both emotion and entertainment.
H3: Adult Happy Meal vs. Traditional Happy Meal
| Feature | Traditional Happy Meal | Adult Happy Meal |
|---|---|---|
| Target Audience | Children | Adults |
| Menu Complexity | Simple, kid-friendly | Gourmet, adult-friendly |
| Drink Options | Soda or milk | Specialty drinks, coffee, or soda |
| Collectibles | Kids’ toys | Pop culture collectibles, nostalgia items |
| Price | Low-cost | Higher, reflects premium ingredients |
As this table shows, the Adult Happy Meal reimagines the original concept to better suit adult tastes and expectations while retaining the fun factor.
H2: Tips for Enjoying Your Adult Happy Meal
-
Check for Limited Editions – Some restaurants release seasonal or limited-time items.
-
Try New Menu Items – Be open to gourmet twists or experimental flavors.
-
Collect Responsibly – If you’re a fan of collectibles, consider trading or sharing with friends.
-
Savor the Nostalgia – Part of the experience is reliving your childhood memories.
H3: Why This Trend Will Stick
The Adult Happy Meal is likely to continue thriving because it combines several key factors: nostalgia, social media shareability, collectible culture, and upgraded menu experiences. For brands, it’s a way to engage adults in a playful, memorable way, while for consumers, it’s an affordable, fun indulgence.
Conclusion: More Than Just a Meal
The Adult Happy Meal is proof that nostalgia sells—and that adults still crave playfulness in their lives. By combining elevated menu options, collectible surprises, and the emotional appeal of childhood memories, it has turned a simple fast-food concept into a cultural phenomenon.
Whether you’re a lifelong fan of Happy Meals or just curious about the hype, trying an Adult Happy Meal is an experience worth savoring. Share your own favorite moments, swap collectibles, and embrace a little bit of joy from your past—it’s a meal for the grown-up kid in all of us.

10 Reasons Black Orchid Is Nature Dark Beauty

Who Is Tom Wagner? Life, Career & Achievements

Silk Cut Purple Strength: Everything You Need to Know

Who Is Alex Karp Wife? Private Life of Palantir CEO

Melanie Zanona Salary, Career Growth & Net Worth Revealed

How to Make Slime: The Ultimate DIY Guide for Kids and Adults
-
 Business8 months ago
Who Is Alex Karp Wife? Private Life of Palantir CEO
-
 Celebrity8 months ago
Melanie Zanona Salary, Career Growth & Net Worth Revealed
-

 Business8 months ago
Rahki Giovanni Net Worth: Income, Fitness, and Success
-

 Nature9 months ago
Fascinating World of Facts: A Journey Through Datos Curiosos
-

 Celebrity9 months ago
Who Is Drew Pritchard New Wife? Inside the Antique Star’s Private Love Life
-

 Entertainment10 months ago
Strands NYT: Unraveling the Digital Threads of a New Online Trend
-

 Entertainment6 months ago
Adam Woodyatt Net Worth Revealed: Career, Income & Assets
-

 Lifestyle8 months ago
Ed Henry Biography, Career, Controversies & Personal Life